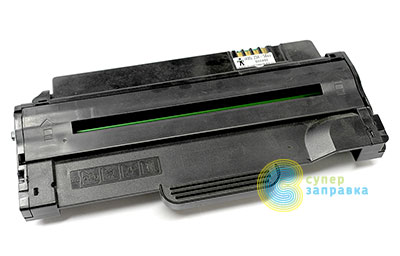
The instruction is designed for inspection of a cartridge refilling process for Samsung MLT-D105S/L and Xerox 108R00908, 108R00909 cartridge models.
Any questions? Leave your comments bellow, we’ll try to help you!
The cartridge is installed in a broad product line of printers and multifunctional devices, both Samsung and Xerox. It is used by the following devices: Samsung ML-1910, ML-1915, ML-2525, ML-2540, ML-2580, SCX-4600, SCX-4623, SF-650, and also Xerox Phaser 3140, 3155, 3160.
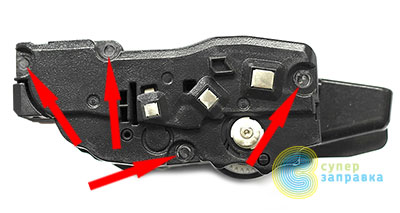
So, let’s begin! In this cartridge, as well as in all latest Samsung cartridges, cartridge body compounds are connected with plastic rivets. Let’s start with them. You may try different options. First option, insert your flat screwdriver in between the cartridge body and the side lid, nearby the rivet, and carefully give it a turn, so the rivet will break and the side lid detach. Do the same thing with all other rivets on the left and on the right side. We do not recommend this option, since there’s a chance to damage the cartridge. We think that themost acceptable option, especially during the first disassemble – is to carefully cut the rivets with the box cutter. First of all it is not as hard, second – your cartridge will stay undamaged.
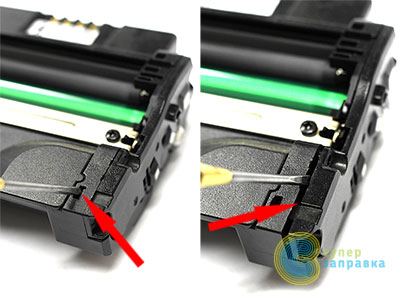
Pry the clips up on the right and on the left sides and take off the protective shutter of the drum.
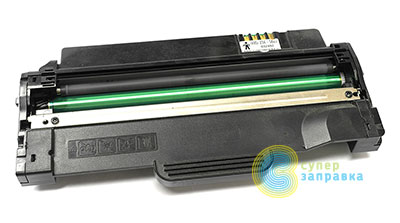
After the shutter is removed, cartridge should look like this:
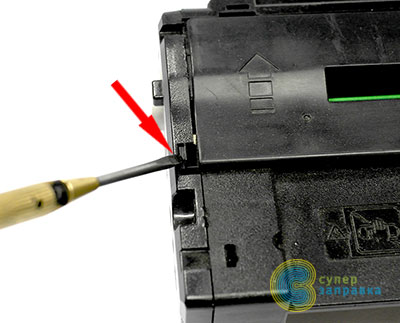
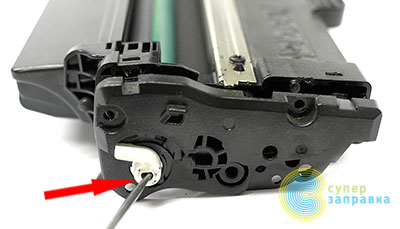
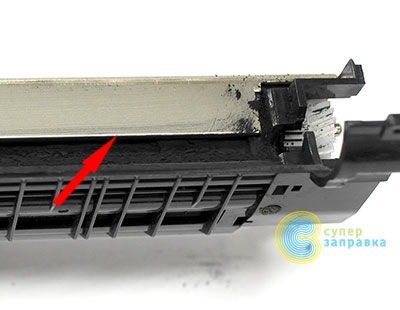
Next, carefully push the clips with your screwdriver and slowly detach the side plates of your cartridge.
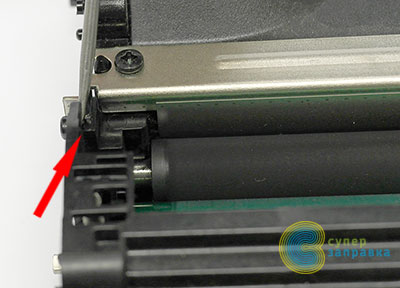
When detaching cartridge side plates, you need to place your screwdriver the same way as shown on the picture, and hold it in that position, so the axis of the drum will not draw out along with the side plate.
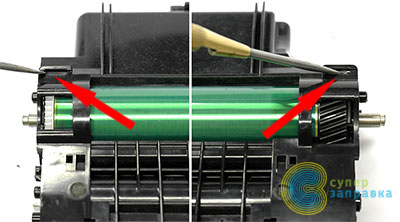
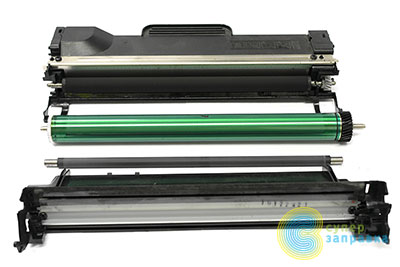
After your side plates are off, let’s continue the disassembling. You can see the cartridge linking ear on the picture. Carefully bend it on the right and on the left sides, and separate the cartridge in two halves.
When separating the cartridge into halves, pay attention to the clips on the back side of your cartridge. You need to separate them as well. People usually break them. So be careful.
After the cartridge is separated in halves, let’s continue the process. Separate the OPC drum from the wasted toner tank. It goes out easily, you just need to perpendicularly give ithe axis a pull and it will unclip. Next, take out the charging roller. Unscrew two screws which are holding the ink fountain blade (the cleaning plate) and shake the wasted toner out. You better not wipe the rubber edge of the blade, since you will need to powder it with talcum afterwards, otherwise your drum may stuck. So, you better not touch it. At the very least, should the edge be really dirty, you may wipe it with isopropyl alcohol and powder it with a small amount of toner. Next, wipe the charging roller, you may use the same isopropyl alcohol or just a rag, depending on the amount of contamination. Then, place it back inside of the cartridge. Pay attention to the charging roller axis. There’s electrical joint compound on the one side of the axis, you better not remove it. After that, place the OPC drum back.
Here’s how the wasted toner half should look like after you have assembled it correctly.

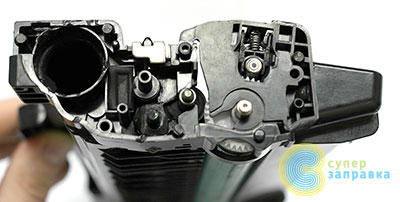
Next, you need to clean the toner reservoir half. Open the cap up and shake all of the toner leftovers. Watch your cartridge reducer gears, you may lose them. You may even temporary place the side lid back, to cover them up. Also, you need to clean the blade in developing unit. You may do it in different ways. One of them could be found here, but we will go different way. Take off the side plate that we’ve installed previously, separate the developing roller. There’s a blade in developing unit against you. To clean the edge of it, use the plastic card or something similar, but something less hard than the blade itself, so you won’t damage it. You may even use your nail, if there’s nothing appropriate by your side.
Assemble everything back. Don’t forget to place the side lid, opposite to that shown at the image. Fill the proper toner amount in. To refill the cartridge we use 80 grams of Samsung toner.
Close the cap. Place the side lid back. Pay attention to the axis of the drum during installation of the side lids. It should not pop out and take the wrong position, otherwise your side lids won’t fit the cartridge body perfectly. The last thing is the drum’s shutter installation. Done, the cartridge is refilled!
For those of you who are lazy to do all of this by themselves, welcome, we will refill it with pleasure for a ridiculous price! Also, remember that this cartridge has a chip that needs to be replaced, otherwise the device won’t work. Or, you may upgrade the firmware of your device and forget about these chips forever. You get to choose!