This instruction is designed for getting acquainted with the refilling of the Samsung MLT-D101S cartridge process. I hope you will find it useful and glean something from it. Leave your comments and critics below.
Cartridge resource is approximately 1500 prints (as to 5% filling per page). The starter cartridge is designed for 700 prints. Constructively, the cartridge is built quite differently from the previous models. The main difference is the development roller metallic cover, which is, along with, the metallic blade in Developing Unit and pieces of the toner between them will surely end up with small useful life. In plain language, after few times your cartridge is being refilled, you may throw it out, since the developing roller and the blade will wear out. Cartridge life may be prolonged only with the replacement of the above mentioned components. This cartridge is also highly demanding as to the toner, because of its new construction. The most toners on the market are designed for old printing systems, where the rubber roller was used as the developing roller. So, this kind of a toner, will possibly speed up the wearing down of the components in the new developing system. That’s why you need to be careful with picking up the right toner.
The main components of the Samsung cartridges are conjoined by rivets.
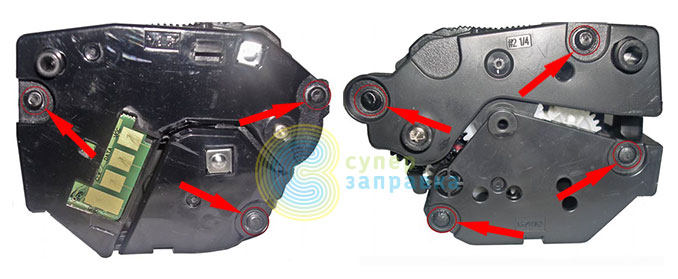 To remove them, you need to carefully cut the heads of those rivets off with your box cutter. They are located on the side lids of the cartridge.
 After removing those rivets, there is no need to make more secure mounting. Side lids carry themselves well. When cartridge is installed inside of the printer it thrusts itself between inner walls and there’s no way for lids to come off. But if you are still afraid, you might drill new holes and fast the lids with extra screws.
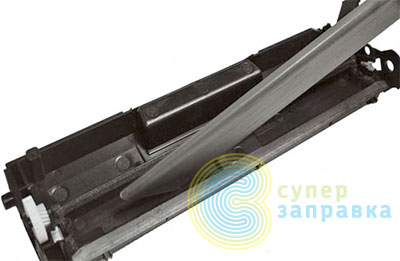
 Now, carefully lift up the lids and take them off. Divide the cartridge in two halves after that.
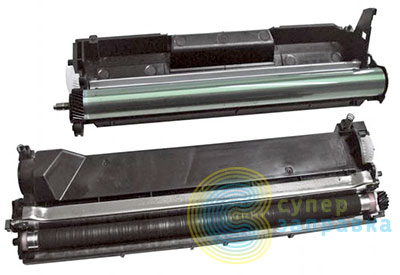 Let’s get down to disassembling wasted toner tank. Slightly push the drum axis out, then lift the drum up and take it out.
 Now, pry up the charging roller with your screwdriver, and take it out.
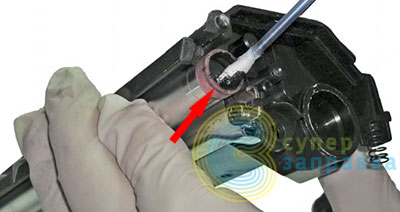
 To clean it, you can use cotton rag moisten with water or special rubber recovery liquid. Put it aside and let it dry.
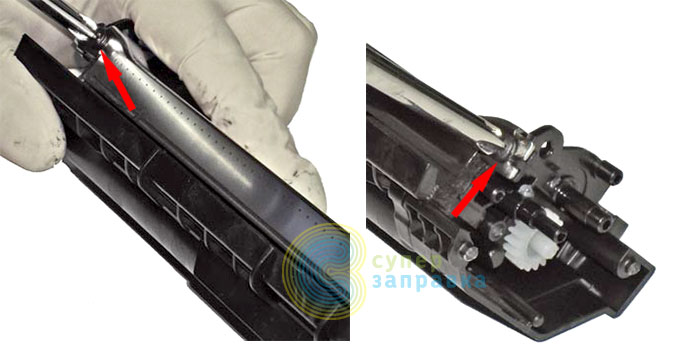
 Unscrew the doctor blade. The mission of this blade is to clean the OPC drum from the toner that wasn’t printed on the paper and to collect the dust and all of the junk that may have possibly got inside of your printer along with the paper.
 Carefully lift it up and take it out. Pay attention to the condition of the ink fountain blade. If there’s any visible contamination, like baked toner pieces, than you need to clean them off with the rag moisten with rubber recovery liquid. After that, you must powder ink fountain blade with the special talk or toner that you will fill your cartridge with afterwards. If there’s no contamination, than there is no need to touch the ink fountain blade. Just put it aside.
 After that, depending on the condition of your device, you either clean out the wasted toner by tapping the cartridge with the screwdriver, or clean the cartridge with the special vacuum cleaner. Now assemble everything back.
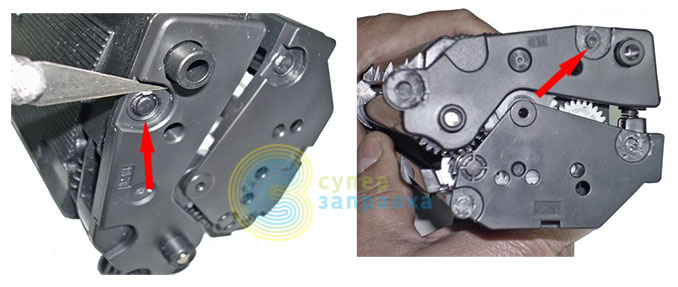
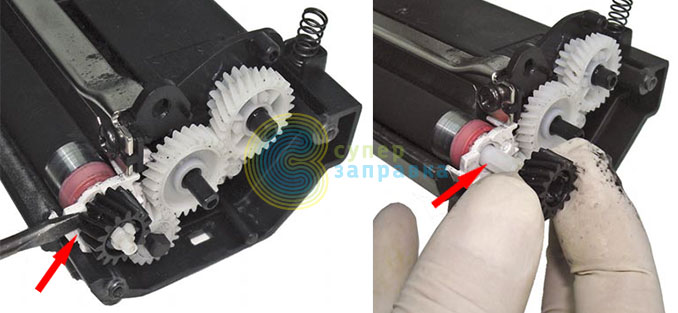
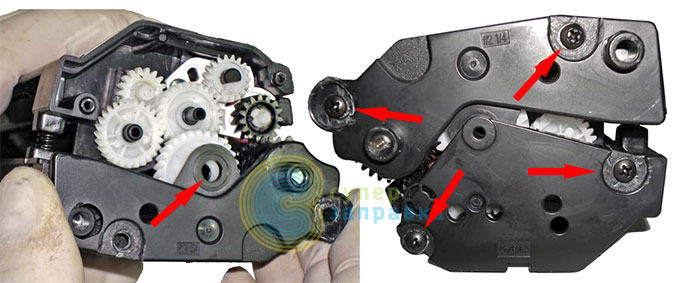
 Now let’s disassemble, clean and refill the second half of the cartridge – development block. Pushing the screwdriver with a bit of the force, take off the roller gear.
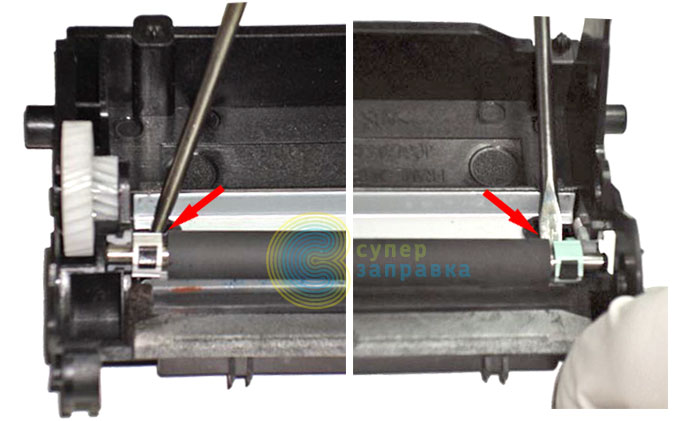
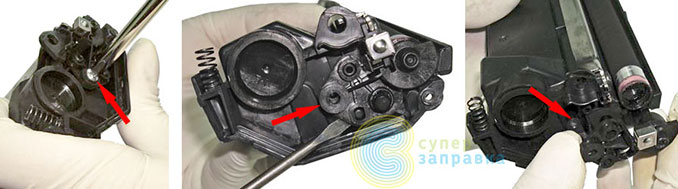
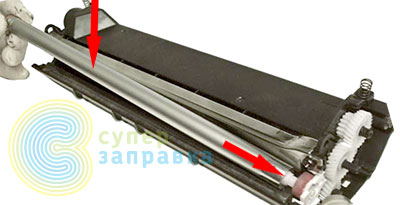
 Unscrew the balance roller plate. Pry it up with the screwdriver and take it off.
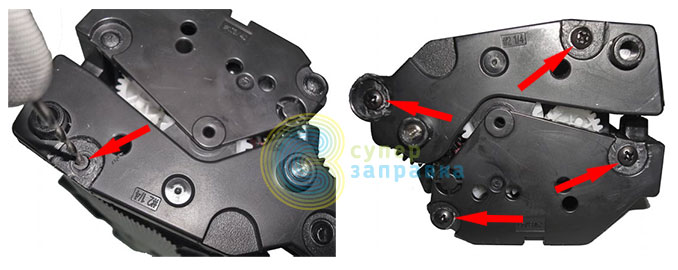
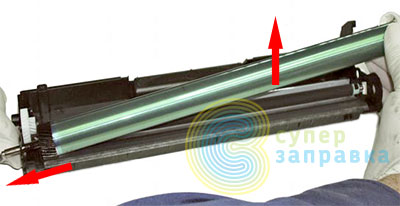
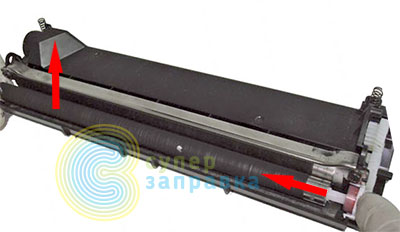
 After that, lift up the roller from one side, move it in the other direction and take it out. Pay attention to the plastic rings. You need to handle them carefully, so you won’t break them. You will need them. You need to clean the developing roller with something: rag, toothbrush, vacuum cleaner. After all the toner is removed you may wipe it with pure benzin to clean it even more accurately.
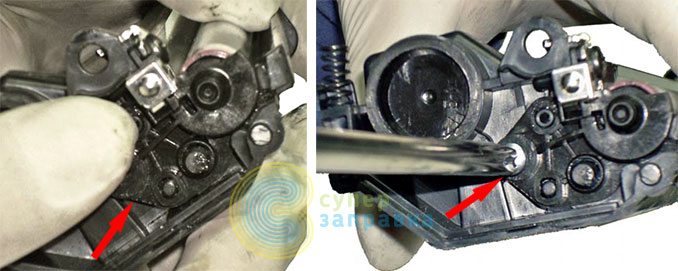
 Now you need to unscrew the blade in developing unit to clean it, and to clean the tank from wasted toner.
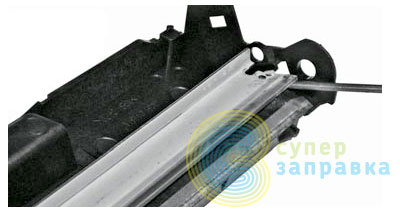
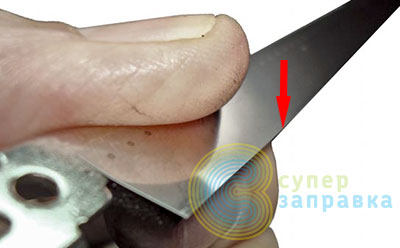
 Be careful with the blade not to make any damage, otherwise you will have long strips on your print, and there will be nothing to do with them. You may clean it with the same old pure benzin. Wipe the edge of the blade with the rag moisten with benzin.
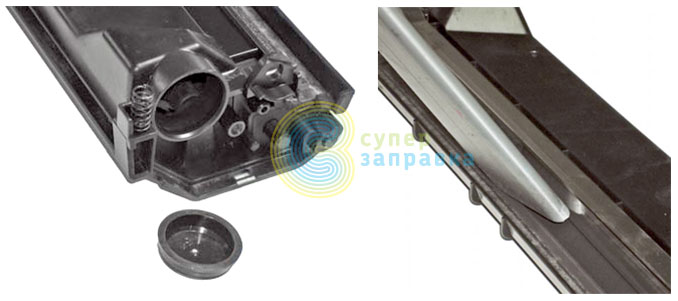
 Next, remove toner leftovers with the vacuum cleaner or by tapping the cartridge with the screwdriver. Remember about the gears block, since you may lose them all. To prevent this, you may temporarily put the cartridge side lid back. Also remember to open the cap. We’ll need it for our filling process.
 Now, assemble everything back. When installing the blade in developing unit, pay attention to the seals. If they were damaged than you need to replace them or somehow repair them (for example glue a piece of foam)
 When assembling you need to cover the inner side of the roller with the electrical joint compound or simply not clean it off during cartridge disassemble.
 End the assembling process by placing the balance plate and screw it down.
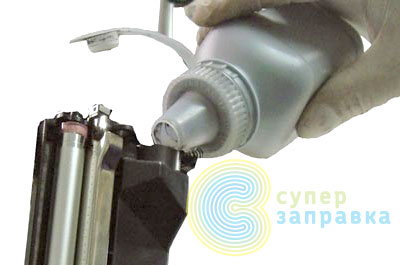
 Long-awaited moment has come. Shake up the toner bottle and fill it inside of your cartridge. This cartridge requires approximately 50-60 grams of the powder. Don’t forget to close the cap afterwards.
 Now, the closing stage, completing the cartridge assemble.
 Centre the cartridge halves and place the side lid. If you’ve drilled new holes, don’t forget to screw them.
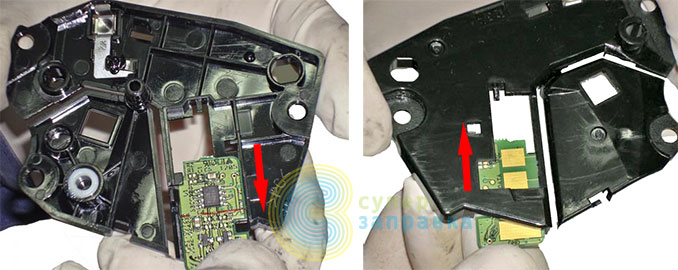
 There’s a chip installed in this cartridge. Printer won’t print unless you replace it for a new one. Or, you may jailbreak your printer with alternative firmware and forget about chips forever.
 Place the side lid and screw it down.
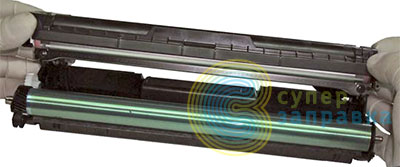
 That’s it! The cartridge is filled! Congratulations!
Having some troubles? Any questions? Leave your comments below, I’ll try to answer them and help you.
Bye bye -)
Adapted from uninetimaging.com
after refilling it shows its status empty and I am not able to print from my computer because it shows as its empty when I call customer care they said use another card instead of refilling so what is it solution that refilling goes on and it is to be printed through computer thank you in advance.
After refilling you should place new chip in your cartridge or reprogram your printer with updated firmware, which you can buy here or another website.