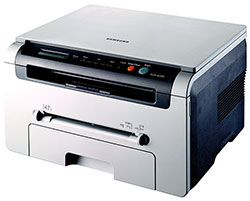
The article is about the causes and possible fixes of quite common failure, light print, of the devices of this series.
It’s difficult to give a definite answer, as the problem may be in the print cartridge or device itself.

Let’s start with the cartridge. We will need one more cartridge to check it. If you get an image with good filling then the faulty cartridge must be replaced or fixed. The most probable causes of light print are the growths of toner on the edge of doctor blade. To clean the blade from excess toner you need something thin and dense, for instance, a business card. Push it into the slot of the cartridge, through which one can see an OPC drum and developing roller. Insert it between the developing roller, metal plate and doctor blade, then moving it along the roller clean the edge of the doctor blade. If carrying out this actions you didn’t fix the problem of light print, then it is necessary to disassemble the cartridge and clean everything thoroughly.
If the cartridge is in working order, the reasons of light print lie in the device itself. So-called “stop-test” should be conducted for more accurate diagnostics. Print test sheet through the printer menu and open the front door at the moment when the sheet is under the cartridge, i.e. under the OPC drum. Then take out the cartridge and check the surface of the drum. If the image filling is good than the problem is in transfer of toner to the paper, i.e. lies in the transfer roller. If the image is light, then almost certainly the laser unit is in bad repair.
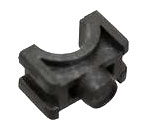
 Let’s start with the transfer roller. The problem lies in poor contact of the transfer roller with the high voltage unit. This contact is provided by bushings (bearing) of the transfer roller. The coating of the bearing is erased after some time and it ceases to conduct electricity properly. It must be replaced. Sure, you can invent something, but it’s definitely better to replace the part, due to its low price and important role. For those who want to do it themselves, the number of bearing of the transfer roller is Samsung JC72-00102A.
The second reason lies in the laser unit. Most likely, it is dusty and it’s necessary to conduct some preventive measures. For this you need to disassemble the printer. Get to the laser unit and thoroughly clean it, mirrors, lenses and polygon mirror. You can use a soft, lint-free cloth and alcohol or glass cleaner. That’s it! Good luck!