This article is designed for you to get acquainted with the cartridge filling process. Look at how it’s done and highlight certain things. Do not think of it as a complete instruction or a call for action. Qualitative refilling requires experience!
So, let’s begin with the theory. What is cartridge, what is it for and what the cartridge basic components are.
 Cartridge is the main block of laser printer or a multifunction device; it is the “heart’ of the device in some way. It contains the printing powder – the toner, and auxiliary mechanisms, which are taking a part in transferring cartridge toner to the paper.
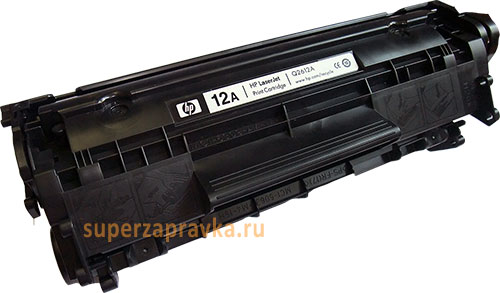
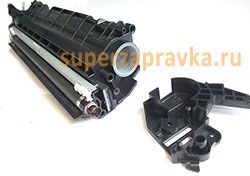
We will get acquainted with the device using the widespread cartridge HP Q2612A as an example. As the majority of HP cartridges, it consists of two halves which are anchored by pins. One half is for wasted toner tank, the other one is for toner itself. Let’s take a look at the wasted toner tank first. Apart from the tank, there are ink fountain blade, charging roller (corotron) and the OPC drum.
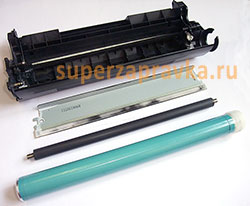 Let’s now take a closer look at each one of the components. Theoretically, during the printing process, all of the toner must be transferred from the cartridge to paper, but it is not so. Small amount of the toner remains on the OPC drum and that is the ink fountain blades’ work. It cleans the OPC drum and transfers toner leftovers to the tank. The charging roller serves for preliminary charge and discharge of OPC drum surface. If the OPC drum is discharged, toner pieces won’t stick to it. And the main part of a cartridge is the OPC drum – the main component, which organizes the image. All of the defects on the surface of the drum will be reflected on the piece of paper. So, treat your drum carefully and thoughtfully.
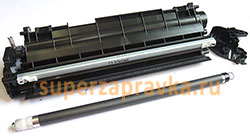 Now, let’s take a look at the second half. It carries toner reservoir, blade and magnetic roller. Toner reservoir carries the printing powder reserve. Magnetic roller transfers toner to the surface of the OPC drum. The blade distributes toner evenly on the surface of the magnetic roller, so the print will be even throughout the paper sheet. Now we’re done with the theory, let’s get to practice.
Let’s start with the most primitive method, but you don’t need to it this way. The easiest way is to drill new holes in cartridge and shake out the wasted toner and fill in the new one. Advantage is that you can do it quickly; disadvantage is that you won’t be able to clean the cartridge properly. You may use this method when all of the other methods seem irrational or when the cartridge construction is completely glued.
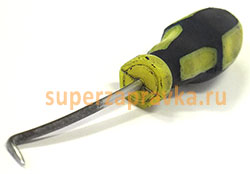 Let’s look at the right way of the cartridge filling. As you have already understood, we need to shake out the wasted toner from the tank and fill the new one inside. To do it, you need to disassemble your cartridge. First, take a look at how the halves are combined. To detach them, you need to take out the pins. To do it, unscrew the OPC drum side lid and take it off. Now, take out the drum and put it aside, so you won’t accidentally bring any damage to it. Now, take out the charging roller. One tip of the roller is greased with electrical joint compound, it should stay there. You may see the ends of pins down at the ink fountain blades bottom, on the right and on the left sides. Press those pins outwards with something like curved awl, and then, with pliers, take it out completely. Also, pay attention to the spring that holds the halves together, you need to place it back after the cartridge is filled. While disassembling, you better hold the cartridge horizontally, OPC drum side up. This way you will save yourself from the toner that may spill out of the wasted toner tank.
The next stage is removing wasted toner. To do it, flip the tank in one quick motion and gently tap it with your screwdriver. Clean everything up and assemble this half back. You better not clean the edge of the ink fountain blade and the OPC drum, because after that you will need to powder the surface with special talcum or toner, otherwise the cartridge may be jammed.
 Now disassemble the second half. Carefully take out the magnetic roller, clean it with some rag. Shake out toner leftovers. Under one of the side lids, there is a cap, using which you may fill your toner. If there’s no cap, than we will fill the cartridge through the magnetic roller slit. Assemble everything back, fill your toner. Rotate the magnetic roller to make sure it is not jamming. After that, assemble your cartridge. When placing the magnetic roller lid back, be very careful not to affect the spring of the drum.
The article is far from complete, it shows everything in general. So, if you want to fill the cartridge by yourself, you better search the web for detailed instruction with pictures. Good luck!