In this article we’ll try to elaborate on how to refill the Samsung MLT-D104S cartridge by yourself. Leave your comments and questions below.
First of all, this instruction is designed for those homemade Einsteins, who want to save some money on the cartridge refill and do it by themselves. Perhaps, some of you might be simply interested in the refilling process, you are welcome as well.
This instruction is not a call for action by any means! It is just for familiarization purposes. You may simply read, look at refilling process, draw conclusions and make decisions. So, let’s begin.
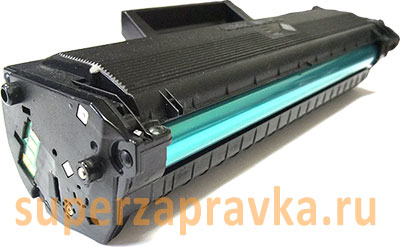
Samsung MLT-D104S cartridge is installed in these devices: Samsung ML-1660, ML-1665, ML-1667, ML-1860, ML-1865, ML-1867, SCX-3200, SCX-3205, SCX-3207. All these printers and multifunction devices are quite popular, since they have really good features, such as good value-for-money ratio, stylish design, and compact size. Moreover, from a technical point of view, these devices are fitted with quite powerful hardware.
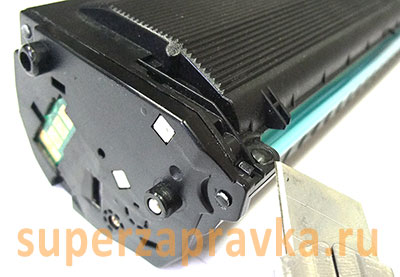
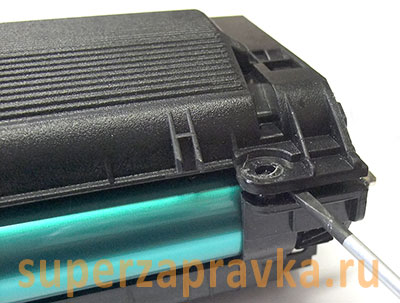
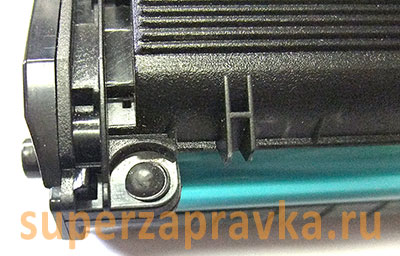 Samsung MLT-D104S cartridge is nicely designed and it’s easy and convenient to disassemble. Small inconveniences may possibly have place since all the details are not pieced together with small screws but with plastic rivets. One of those rivets is shown on the picture to your left. Don’t be afraid, it’s nothing complicated. You can cut it right of with your box cutter. But you better not cut it off completely, you better cut the melted part, so you will have a plastic pin sticking out of the lid. This way, cartridge lids will hold on better and more safely.
 We don’t need too much tools to continue our cartridge disassemble. We better prepare everything we need now to avoid possible distraction during the process.
So, we need a box cutter, flat screw driver, cross screwdriver, a piece of some rag (better some cotton fabric, without any fluff), a funnel for toner refill and toner itself. At the end of this article we will give our toner recommendations, but let’s leave that out for now.
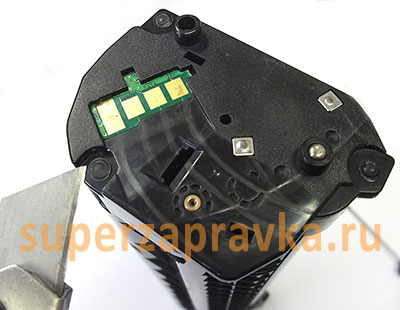
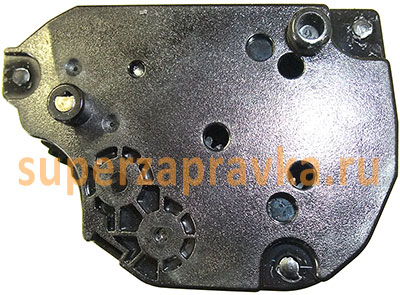
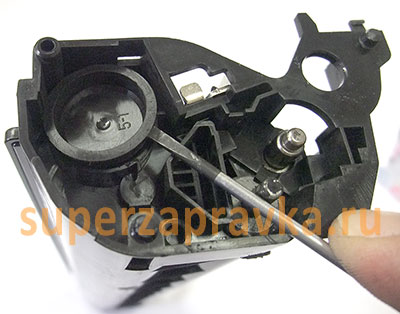
You can see the side cartridge plate with the installed chip on this picture. Take a knife and carefully cut the melted parts of the three rivets. Be careful, because the knife is very sharp and one careless movement may cause you to hurt yourself.
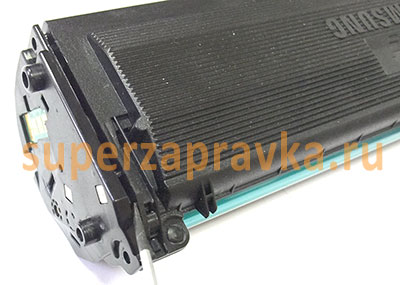
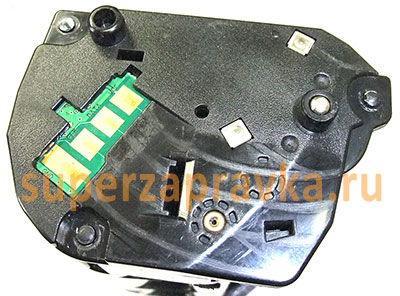 After the cutting you will end up with something similar to this picture. Three neat pins need to be sticking out of the lid. If you don’t want to bother yourself doing that, you may just cut them flush with the cartridge lid. But we do not recommend you to do this, since it will be more reliable to leave those pins, so your lid will hold on better. Technically, you may drill new holes after that, but it is not necessary. Cartridge fits there quite tightly, so there’s no need to worry about structural integrity.
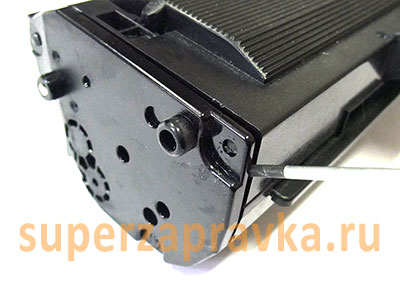
 The same thing needs to be done with the opposite cartridge lid. Do it carefully and slowly.
 Keep taking your cartridge apart. Now, rivets on the upper cartridge lid. Carefully cut melted parts of the right and left lid rivets. That’s it; prior operation is over, now we can start to disassemble our cartridge.
Need to say a few things about further process and about caution cartridge handling. Since it is the first time you refill the cartridge, it is possible that toner may spill from where you’re not expecting it to. To prevent that, follow this instruction. Pay attention to the details. You need to cover your work surface with something, something that you don’t mind throwing away afterwards. Use some papers that you don’t need. The most valuable thing in the cartridge is OPC Drum. The surface of the OPC Drum is quite fragile. One careless movement with your screwdriver or a knife, or maybe hitting it against the wall will end up with cracks that will affect the printing process in future. And there will be nothing to do but to buy a new Drum. So, be as careful as possible. I believe you don’t need extra expenses.
 So, here’s the crucial moment – cartridge disassemble. Take a flat screwdriver and carefully push it in between the cartridge body and the left lid. Bit by bit, detach the cartridge lid from the body along the perimeter. You need to be careful, so you won’t break anything.
 Do the same thing with the right side lid. Carefully separate it from the cartridge body. Take off the side lids and put them away, you don’t need them for now.
 Are you exited with doing it all by yourself? It will be even more interesting! After your side lids are off, we can get to the further cartridge disassemble. Insert your flat screwdriver between the bottom of the cartridge and its upper lid. Carefully spinning it from side to side unclip the lid from the base of the cartridge. During this process pay attention to the rivet pin spot, be careful not to break the cartridge lid in this area.
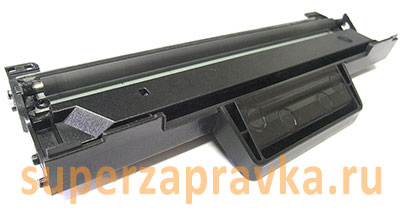
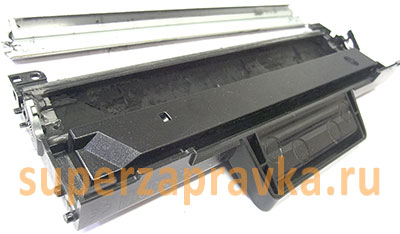
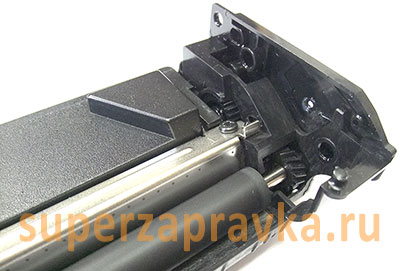
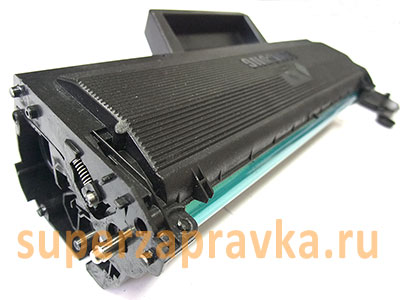
 Do the same thing with the right side of the cartridge. Using the screwdriver, slowly lift up the upper lid. Now, attention! There’s a waste toner inside of the upper lid. And if you’re not careful enough, there’s a risk whelming everything around with it. The toner might spill through the front cartridge slit. You need to flip the lid backwards, as if it is a cabinet doors, but horizontal. You can see how the lid supposed to be placed on the next picture.
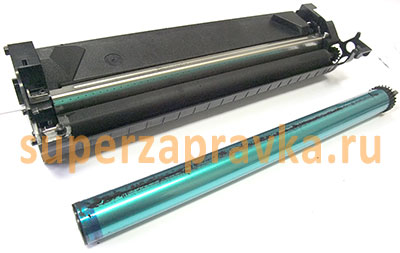
 So this is our apogee! The cartridge is disassembled now! The main part is done. Now there’s nowhere to run, it will be easier to refill it that to end this process up. Pay attention to the right side of the cartridge, where drive gear block is. It may shoot out and you will lose them, so be careful with this cartridge part. It may become quite a problem for you.
 Let’s move on? Let’s start with the upper cartridge lid. In this part of the cartridge there are: waste toner tank, drum wiper blade – ink fountain blade and the Primary Charge Roller. Before we start to disassemble it, pay attention to how the Charge Roller is installed. The metallic tip on the one side of the roller is longer than on the other, and it’s important in terms of assembling. When you’re done make sure you have everything the same way it was originally set.
 Next. Take the flat screwdriver and using it as a lever, unclip the roller out of bearing. Slide the other side of the roller out.
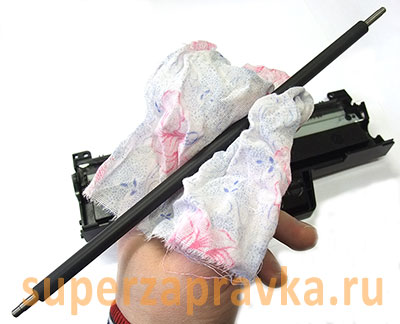 Now we need to clean up the roller. Keep your eye out for the electrical joint compound that is on the one side of the roller, you better not remove it. This compound provides contact with the responsive roller part. You can remove the compound from the metal core, since there’s not just oil; there are also dust and toner pieces. The rubber surface may not be cleaned during the first refill, but it is certainly better to do it. If it is not too dirty, you may use a clean rag. Hold the roller by the metallic part, wrap it with your rag and clean it up and down. The surface needs to be smooth, without any whitish deposit. To clean it even more accurately you may wash it with the warm water and soap or try using rubber surface cleaner. You may use something like pure benzine or white spirit. Now we’re done with the roller, put it aside and let it dry while we are moving on.
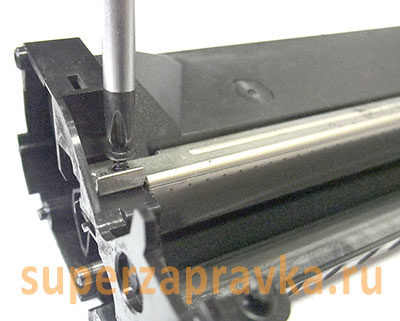
 Take your cross screwdriver and unscrew two screws that are holding the ink fountain blade, take it off. Technically, you may not do this; you can simply empty the wasted toner through the slit between ink fountain blade and the toner tray. But since we are training to refill the cartridge properly, you better do unscrew it and take it off.
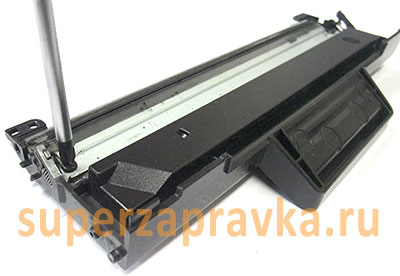
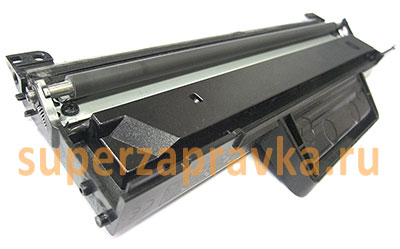
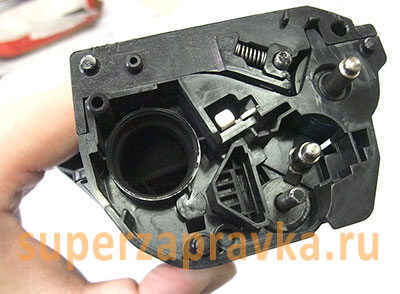
 After your ink fountain blade if off, you’ll see the tank with the wasted toner. Look at the picture, on the left side, there’s wasted toner that needs to be moved away from the tank.
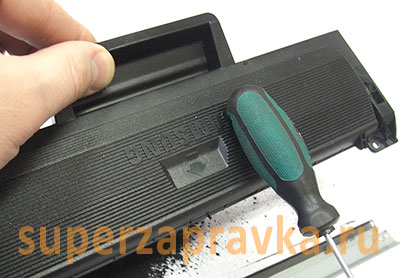 To do it, take the half of the cartridge and turn it over in one quick motion. By tapping the cartridge with the screwdriver, remove all the toner from the tank. Maybe you have a special toner vacuum cleaner, than you should better use it here, since it will clean up the tank better. In our office we use cartridge cleaning station. It uses compressed air to blow off all of the wasted toner. Quick, clean and convenient!
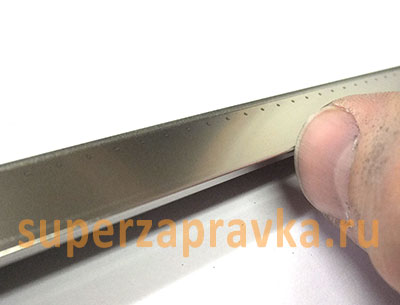
 Now, get down to the assembling of a wasted toner cartridge part. Carefully clean the metallic ink fountain blade. Don’t touch the rubber part. Because after you clean it up, you need to powder it with the talcum, so it will slide along the drum surface better. Otherwise the drum may be jammed and the rubber blade will be torn apart. Fasten the ink fountain blade to the cartridge lid.
 Now, place the charging roller. Do you remember what I’ve told you? You need to place the roller the same way it was originally placed. During installation you should hold the roller by the metallic axis, so you won’t leave your fingerprints on it. Otherwise your printing process might be defected. That’s it, congratulations, this part is done. Let’s move on.
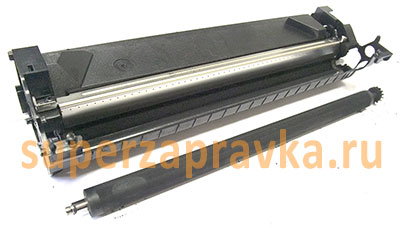
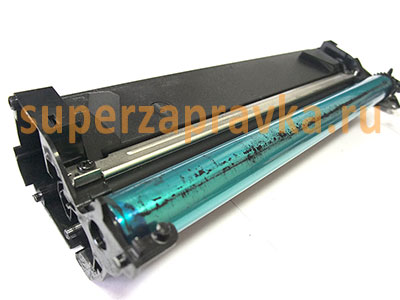
 Take the OPC Drum part. In this part of the cartridge we have the toner tank, blade, developing roller and other auxiliary mechanisms. Now we will disassemble it.
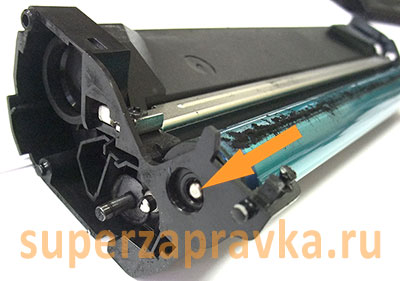
At first you need to take out the OPC Drum. To do it, sink the drum axis in to make it flush with the side of the drum. Be careful not to drop it inside. It is nothing serious, but still, it will require a few additional moves to take it out. There are conducting vanes inside of the drum, which are contacting with the axis. So, should you install the axis the wrong way, you may damage these vanes and there will be no contact between the drum and the axis, so you should pay attention here, and do not take the axis out completely.
 Now, lift up the drum from that side that you’ve sunk in and carefully take it out of the cartridge. Hold the drum as close to its sidewalls as possible, so you won’t leave any fingerprints. They might affect your printing process. Now put the drum aside, to a place where it won’t be accidentally damaged. Don’t forget about the cracks, pay attention.
 Now, the next step. Need to mention, that if it is the first time your cartridge is being filled, this step is not essential. In practice, the defects are coming out later than the first cartridge refill, and that’s why you may neglect this step. But we’re making everything properly, are we?
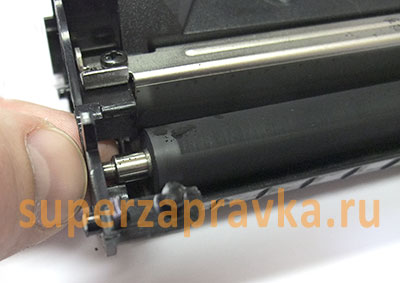
If the image density is uneven with this cartridge and you see thin, chaotic lines of an unprinted image, you need to clean the developing roller and the blade. So, first you need to take the developing roller out. Push out the roller from the left side of the cartridge to unclip it.
 Do the same thing with the other side. Now take the roller out. You see, there’s a gear at the end of the roller? Memorize how it is installed. When assembling everything back you must put it the same way it is now.
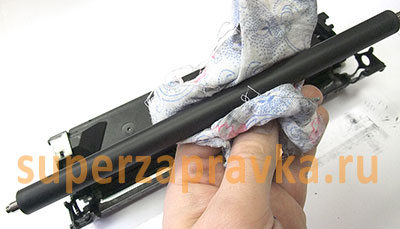 Now clean the developing roller. Everything that was said about cleaning the charging roller is right for the developing roller. So we won’t describe the process again.
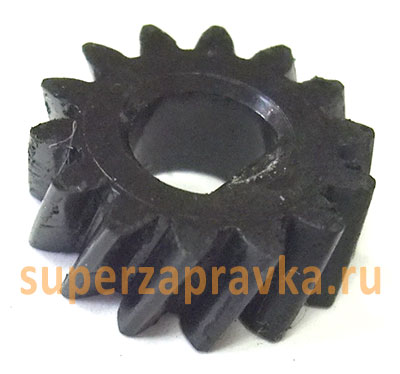 You can see the developing roller gear on this image. You may see the facet inside of the gear, if you look up closely. This facet needs to be faced inside of the developing roller.
 Now we need to clean the blade. You don’t need to take it out; you may clean it as it is. But it is better to practice a bit and take it out. Unscrew it and separate it from the cartridge. There’s the seal under the blade, try not to damage it.
 Next, with something not solid, clean the adhered toner. It may be a match or your fingernail, something that won’t scratch the surface of the blade. And, in addition to that clean it with the rag. Now we’re finished here. Assemble everything back.
 Now we need to clean the cartridge from the toner that was not wasted. It is necessary to prevent the mixing of the old toner and the new one. Otherwise you might have a background on your printed paper. Temporarily place the right side lid back, so while you’re cleaning toner leftovers your developing roller and gears will stay in place and won’t fall out. If you have the vacuum cleaner, you might have done it before installing the roller back, through the split and opened cap.
 After that, using the screwdriver pry the cap up and open it.
 Turn the cartridge upside down and shake out the toner leftovers by tapping the cartridge with the screwdriver. In our case we don’t have much toner left here, apparently the cartridge was used to the bitter end.
 After that, take the side lid off, and carefully install your OPC Drum. Pay attention to the drum gear, it needs to be on the side of the developing roller gear. Don’t twist it up. After that, put the axis of the drum to the original position.
 Now, place the upper cartridge lid. Make sure that attachment holes match the plastic pins of the base of the cartridge.
 Now, place the side cartridge lid. Again, make sure that plastic pins fit perfectly with the holes of the lid. One more important moment, the axis of the OPC Drum must fit the hole in the lid. Beginners usually forget about it and push it in as it is. It’s wrong! There’s a cut on the axis, and there’s a slot on the lid. This cut must fit the slot perfectly. As shown on the picture. Otherwise you will have a hard time placing the cartridge to your printer and side lids will be loose.
 And now we are about the most long-awaited moment – toner filling. As I’ve promised earlier – a small toner recommendation.
This type of cartridge uses toner that is suitable for other Samsung cartridge models. You can find this toner anywhere you want. It is of a good quality, and there should be no problems filling it. From those brands on the market, we can advise you the АТМ toner. Inexpensive and qualitative. It will do as a universal Samsung toner, or for other models, like Samsung ML-1210/1710, SCX-4200/4300 etc. Look what there’s on sale; ask the shop assistant what toner is better from the customers’ point of view, and buy the one, there should be no problems.
Take your toner bottle, give it a shake, take your funnel and fill the cartridge with your powder. You don’t need to fill it all the way up. Next, close the hole with the cap. Don’t forget about it, because you will have all of your toner inside of the printer.
 That’s it, the final part of an article. Place the left lid back, stick down the chip. Done! Your cartridge is filled. We hope that this article helped you to defeat the Samsung MLT-D104S cartridge and you are happy with yourself.
This might be the end, but there’s one more thing. It’s not enough just to fill this cartridge with the toner. There’s a chip that blocks the cartridge after the toner went out. To make it work again, you need to replace the chip. But there’s a catch, those chips that are on sale are for the most part defected and not all of them in the working condition. The comprehensive solution for this problem is making the jailbreak of your device with another firmware. You do it one time and never bother yourself with the existence of the chip. You can find the firmware on the web. But think this question over. The firmware for Samsung ML-1660, ML-1665, ML-1667, ML-1860, ML-1865, ML-1867, SCX-3200, SCX-3205, SCX-3207 is not free. Those that are free, are not always working and you might simply kill your device. So, if you have decided to resolve the refilling cartridge problem by yourself, we recommend you to study the issue deeply.