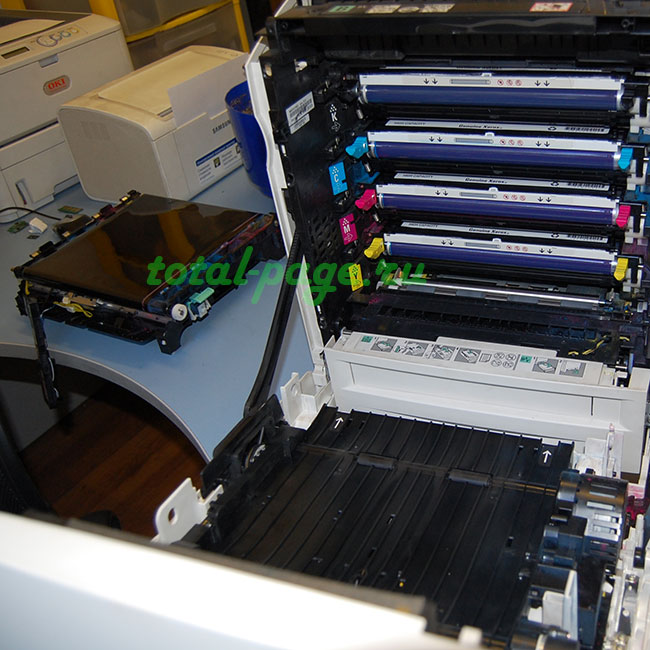
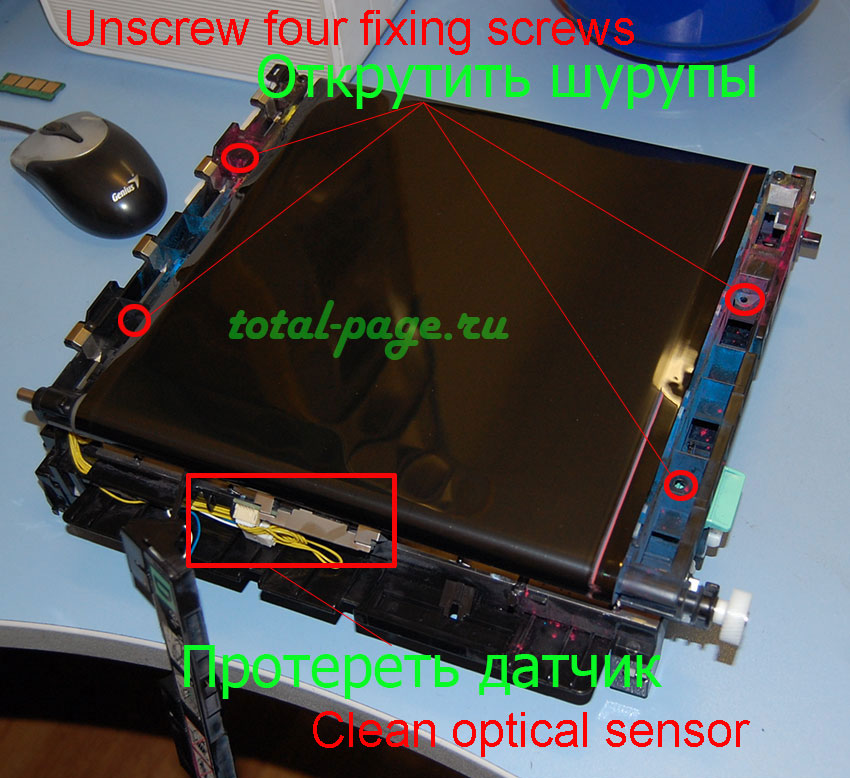
For convenience, separate the transfer belt unit from the printer, it’s really easy to do. Originally unit was designed to be replaced in one step. In the removed unit unscrew four fixing screws and separate the tape from the plastic base. While doing this we also recommend to clean optical sensor, which is hidden behind small plastic block.
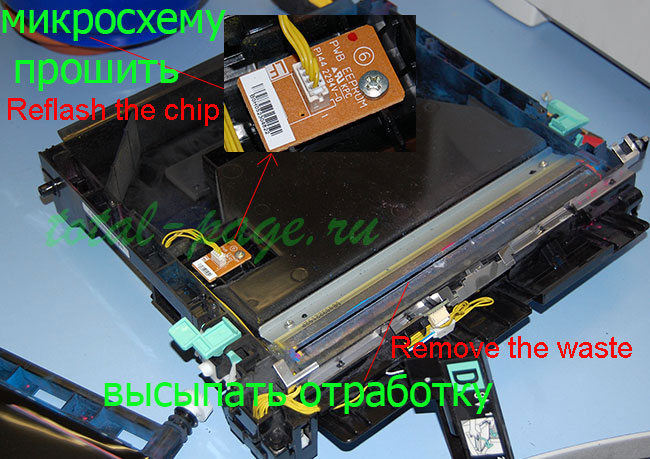

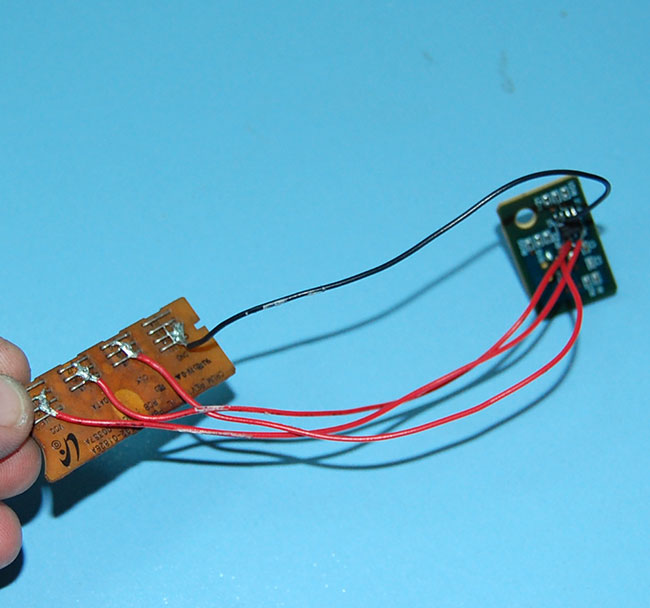
Having removed the unit you will see container with waste toner and circuit board, in which the resource of transfer belt is fixed. Unscrew the circuit board, it’s circuitry consists of chips 24s02 in SOIC8 housing and trim. Unsolder the chip and reflash it using the programming tool which supports 24cXX chips. It’s not obligatory to unsolder the chip, you can reflash it connecting to it with wires.
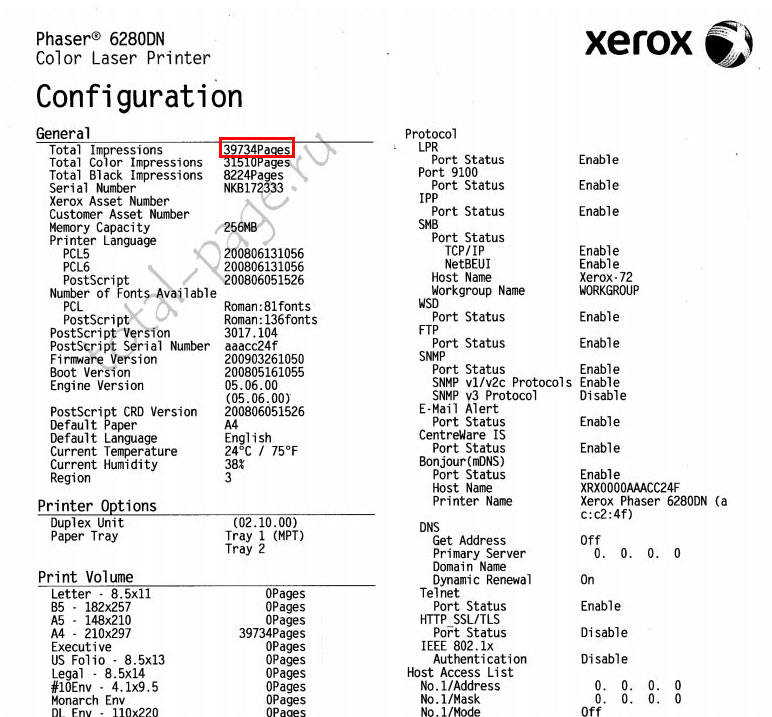
Use this dump as a firmware. Attention, the firmware is downloaded from the device with mileage (at the moment of reading the dump) – 39734 copies. In fact the tape spent third part of its resource, but I think, the remaining working capacity will be enough.
Adapted from total-page.ru
Dobrý den ,
uvítal bych podrobnější informaci jak resetování provést.
děkuji